Thursday, July 31, 2008

See-ment Floors

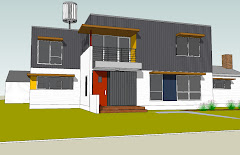
Here's a post I had begun working on in early May and then promptly forgot about while more pressing matters were at hand. Here it is slightly modified for your reading pleasure today.

While the wood floors in our kitchen and bedrooms are being installed, the giant sandbox of our dining and living rooms is quietly leaving us and our new concrete floor awaits. Yep, we're using exposed and polished concrete for our flooring material in our living and dining room. (For the record, Jethro was incorrect in calling the swimming pool the "cement pond" and added to the confusion over the differerence between cement/concrete). Concrete. It's hard. It's simple. It's gray, it's durable, it's cheap. It's relatively simple to make. You take some sand, aggregate, cement and some water, mix them together and there you go. Not much has changed in the 2,00+ years since the Romans started messing with the stuff to build things like this. We like the look of concrete and the fact that it can be a finish material all by itself and doesn't need covering up with other materials. It's thermal mass will help keep our feet and space cooler in the summer and warmer in winter and we'll not worry about scratching it or spilling something on it because, well, it's concrete.
We did add piping underneath the slab, so we can have infloor heating someday if desired.


Concrete is a great material, but the embodied energy in one of its principal ingredients - cement - is actually pretty high. It is non-renewable, needs to be mined from the earth and quite often shipped from a great distance to reach a local production plant.

Consider this: "Two and a half months ago, a ship left Thailand loaded with Portland cement. It spent three weeks crossing the ocean and another week going through the Panama Canal before docking in New Orleans, where its cargo was transferred to barges. These barges then spent six weeks traveling up the Mississippi to Minneapolis, where the cement is now arriving at batch plants for use in concrete. Over 80 million metric tons of cement were produced last year in the U.S., but another 20 million were imported to meet the demands of our booming economy." EBN June, 1999 A view of the concrete floor just after it was poured. Our concrete contractor, Buckcrete, cane back in a day or so to cut in the joints. 28 days later, after the concrete had a chance to cure and come to full strength, we polished it to a nice terrazzo like sheen.
Polishing and sealing the floors.

One of the ways to reduce concrete's embodied energy quotient and carbon footprint is to reduce the amount of cement used in it's production. We can do this through the use of fly ash, a by-product of coal burning that would otherwise find its way to a landfill somewhere. By substituting a generous portion of the cement with fly ash , we've reduced the carbon footprint of the concrete while at the same time making something that looks good. The fly ash gives the concrete a slightly darker shade, and is denser, stronger, and richer looking when polished. The polishing makes it look pretty but is also a healthier choice because the polishing tightens up the pores in the concrete it retards staining. This way we eliminate the need for an additional sealer that needs to be reapplied every few years. We just have to be willing to wipe up spilled wine within 24 hours if we want to avoid some staining. Then again, some patina is kind of fun!
Polishing and sealing the floors. Wine is not the only thing being spilled on our floors....


Sunday, July 27, 2008

Before and After Photos

Sorry, we’ve been lazy about keeping the blog up-to-date lately. The best excuse we can come up with is that we’ve been just enjoying our new house and neighborhood and trying to make up for some lost sleep over the last 6 months. .

Good News-----The best news this week is that we closed on the sale of our old house on Friday. As much as we loved that house, we are very relieved to not have another property to worry about.

I thought I’d do a little photo essay on “before” and “after” photos. Because we’ve so radically transformed this house, it’s sometimes easy to forget that this was an existing 1940’s house. Last week the former owner stopped by to pick up something that had been squirreled away in a closet and even he had a tough time remembering what it was like before. I'll do one on the interior in the future.


We changed the location of the front door and added a full 2nd floor.


We kept the gabled roof form on this portion (Kevin's studio) and just changed up the materials.


I wish we had that green grass now!


We will soon reinstall some of those brick pavers and dispose of the plywood sidewalk.


Part of our reason for doing a transformation such as this was simply to show that it can be done. We hope we've illustrated that you can make your current house (or an existing house) your dream house - and to do it in a way that is energy efficient, environmentally responsible and affordable (a subjective consideration, I know). You can be modern, Tudor or Victorian - the style doesn't matter.

It is certainly easier to start with an open lot and brand new construction than with an existing house, but one of the best things you can do from an environmental point of view is to keep existing structures in good repair and service. Living in the city is also good - we're utilizing existing infrastructure, neighborhood services, adding to density - all good things to keep our ecological and carbon footprint smaller.

It turns out to be a good economic decision as well. Certainly land costs are a little higher when buying in the city but overall, this project cost us less to build as a significant remodel than a brand new home on a new lot would have in spite of some of the extra surprises that remodels often yield. Most new homes are being constructed for $170 to $200 (and beyond) per square foot these days - just for normal construction - nothing fancy. When all is said and done, we will have spent under $125 per sf including all the "extras" such as high performance windows, super insulation, solar HW and PV systems and a green roof! I calculate that without all those extras we would have spent about $110 per sf. All those extras added a little more than 5% to our overall budget (the better windows and insulation, roofing, etc add only a little bit more than the usual suspects do) and offer an average calculated payback of less than 7 years - it would be lower yet but our solar systems increase the payback average considerably.

This project has not been an easy one for us financially. We are pretty frugal people and are not accustomed to spending this much money on anything. However, we realize that even though it will stretch our capacity and limits for a while, investing in our beliefs, our future, our children our neighborhood and our planet is the right thing to do. It would have been easy to always look for the cheapest alternative and least expensive option - but those choices often end up costing much more over the long haul. A building's first cost is somewhere around 6% of its total lifetime cost (assuming a 50 year life span) the rest of it is spent in operating and maintaining the building. It doesn't take a rocket scientist to figure out that spending a little more now to save a lot later is a pretty darn good value. If I can cut my operating expenses in half with a very modest increase in first cost, the savings will pay for themselves again and again. Call me a liberal if you want to, but that's conservatism at its best! Oh, and all that money saving happen to benefit the environment too, so you can still call me a tree hugger - its okay.

Sunday, July 20, 2008

We're In HOT Water


No we're not in trouble - at least as far as we know, but we do have a lot of hot water at our fingertips thanks to our solar hot water system. I've even had to adjust the balance on the system because we're making so much of it.
In response to a couple of requests, I'll do a bit more explanation of our solar thermal domestic hot water system. That's quite a mouthful for something that makes hot water for our household use.

Here's how it works:

Solar Collectors are mounted on the roof. Piping runs through the solar collectors and down into a storage tank. Inside the piping is a glycol solution that picks up heat when running through the solar panels and sheds heat when it gets to the storage tank (The pipes are full of hot glycol. The hot pipes make the water in the tank hot). The hot water, when it's hot enough, goes directly to our showers, baths, sinks, etc. If it's not, it goes to our back up water heater (the water heater that came with the house) and gets brought up to temperature. Sounds so simple you'd think a code inspector would understand it right? Well, I suppose that's another story for another time.

Right now, our water is plenty hot. This winter, I expect the water heater will have a little work to do, though not nearly as much as it's had to do in the past.

Our solar panels are Solar Skies SS-32 Flat Plate Collectors, 4'x8' mounted at 45 degrees. We mounted them "landscape" rather than the traditional "portrait" to reduce their profile. Mario of Best Power International custom designed this system and improved the way the piping works in this type of installation. We're getting higher efficiencies and a much sleeker aesthetic. It's pretty dang sexy.
The panels have anodized aluminum frames, low iron textured glass and a high efficient nickel-chrome selective surface copper absorber. All of these things increase solar energy transmission - making them more efficient.

Our Solar storage tank is an 80 gallon Rheem HE Soleraide tank (in addition to our 40 gallon water heater - so we have 120 gallons of superbeautifulandwonderful hot water when we want it.


The system also has an expansion tank, a controller, sensors and a Caleffi Pump assembly.

The pump and valve system essentially manages and controls water temperature. It brings in cold water when it needs to or sends the warm water to be made hotter in the existing water heater. (If the existing water heater hadn't been a fairly new, energy efficient model - we'd have done a different kind of combination system.)

Wednesday, July 16, 2008

Down the Drain- the evils of Garbage Disposals


I grew up in the country without the luxury of a sink garbage disposal. When I bought my first house, it had a disposal, which I was quite proud of. I remember the first time my parents came to visit. They were enthralled with all the scraps that could just go into the sink rather than a smelly bucket under the sink. “Can this go down there?” they inquired about the corn cobs...... I guess there is something fascinating about a machine that will take in scraps, grind them to smithereens and makes them magically disappear.

Only problem is that they don’t just magically disappear. It takes a good deal of running water to wash the ground scraps away and it taxes the city sewer system. The city Raleigh NC recently banned the installation of new garbage disposals. It caused quite a raucous I understand, with people claiming it is their God-given right to throw scraps down the drain. Other communities are offering composting programs where, along with garbage and recycling pick-up, they will pick up food scraps.

Although we don’t have a compost program in St Paul, we are planning on having a compost bin in the yard and collect food scraps rather than sending them down the drain. We did not install a garbage disposal and won’t miss it at all because we didn’t have one in our last house either. So, I’m trying to find a bin that will look good (although it will sit under the sink) and contain smells. I’m leaning towards this model because it’s simple and clean in design. It doesn't have a filter, like the more elaborate and expensive models, but I'm thinking we won't have anything sitting in there too long before taking it to the compost bin outside.

This stainless steel compost pail costs 19.95 from Gardener’s Supply.

As far as a compost bin, I’m looking for input. There are models that tumble and ones that require turning with a shovel or pitchfork. I’m looking for easy. Any suggestions out there?


Don't they look like they are having fun tumbling their compost?

Thursday, July 10, 2008

Can Air Conditioning be Green?

So we’re starting to feel a little more at home now that we have gotten the first few scratches in the new floor and have little handprints on the walls and windows. When we first moved in, it felt like we were vacationing in someone else’s house. I think this is because we were cautious about all the new floors and walls- being careful not to dent, ding or scratch anything. We still are being cautious, but the reality of having 3 kids is setting in and we realize at some point, we’re just going to have to settle for the “patina” that comes with children. I have no idea how the new wood floor is getting scratched!

One thing we’ve gotten a few questions on the last week is how can our house be ‘green” and still have air conditioning? Good question. We’ve never lived in a house with built-in air conditioning until now. We’ve had window AC units before, but never the full meal deal. So, here’s the scoop on our AC:
- The existing house had a new AC unit, sized for 2 tons. We didn’t want to toss that equipment and refrigerant in the landfill and so decided to keep it in use.
- The existing AC unit isn’t large enough to provide cooling for the entire house by normal standards, so our mechanical contractor initially recommended that we reuse that AC unit, plus add another 2 ton unit. We resisted, because we don’t like the inside air too cool in the summer- we just wanted enough to take out the humidity and keep it comfortable.
- We settled on reusing the existing AC unit and only air conditioning the upper floor (where the bedrooms are). We have an opening between the first floor and second floors which acts as a natural convection chimney, helping to move air around the house through passive ventilation. The 2-story space allows the cool air to fall down to the first floor and keep it cool as well. By doing so, the ac unit works a bit harder and stays on longer when it does run – which actually helps improve its efficiency. We also tied the return air ductwork serving the two floors together to help balance the system.


- Because we have such good insulation in the walls and roof, and good air sealing, along with great windows the house stays naturally cooler. When it cools down, it tends to stay cool. It’s the same concept as the coolers you carry to your picnic – we keep the cool air in and the hot air out. It helps that our living spaces are facing north and we have exterior sunshade above the windows on the south.
- At night, when it isn’t too humid, we open up the windows and let the cool air in. Every room has windows on at least 2 sides, so it’s easy to get cross-ventilation.
- We keep the thermostat at 78 degrees, so the AC doesn’t have to run much. In the winter, we’ll keep the temperature set at 65 degrees)

It’s not such a bad thing – actually being cool enough to sleep. We’re better rested and happier people if we haven’t stayed up all night sweating in a hotbox.

Friday, July 4, 2008

Settling Into Our New Digs

We're back! We are officially moved in and living at the new house now. We were even able to take the day off from tackling boxes and enjoy the annual Flynn Family 4th of July gathering. We were lucky to have great weather for move on Wednesday. It only took the movers 4 hours because we had been able to get a head start on hauling boxes and miscellaneous items over earlier. A couple of weeks ago, I had started taking a van-load (that’s right, we have a minivan) everytime I stopped by the house. This head start on moving really took the pressure off and we were able to have the entire kitchen put away before the official move even started. Regardless of that, we were still overwhelmed with all the stuff!


Before photo of Family Room/ Shared Office
2-days and a million boxes later...


Looking towards the living room on Wed.


By Friday, we're looking a bit less cluttered- but still a ways to go.


A couple of thoughts on moving into a new place:

- I think I will feel like it’s really our own place when we learn to use all the appliances. I’m not one to read manuals before diving in and trying. I figure that it should be intuitive. But I guess I’m used to really old appliances without any bells and whistles, so there were a few glitches in the dinner-making the other night. (BTW- the Bosch dishwasher is so incredibly quiet, I can’t even tell it’s running when I’m right next to it!)

- The way to get an 8-year old boy to take a bath is to have a new air bath. Declan was on his 2nd bath for the day when I made the new rule that he has to ask us before he’s allowed to take a bath.

- We love the way our house is so filled with daylight. So far, we don’t need any lights on until about 8:00 pm.

- We’re really happy with the way that our house and it’s spaces are oriented. The living spaces on the north are able to stay cool during the heat of the day. We are also able to get great cross ventilation through the house.

- We’re discovering that it might be really hard to keep the dark wood floors clean. I’m hoping that part of the problem is that the duct work needs to be cleaned, which we will do shortly.

- Bonus for the large kitchen sink is that it’s the perfect size bath for a 19 month old. I hadn’t thought of this earlier, but we were forced to look for options when I discovered the lower level bath had only hot water (no cold water to temper it).